How To Fix Your Fogged Headlights


As a vehicle ages, it needs more effort to keep it looking new. The flawless paint gets chipped, the once black tires fade, and the clear exterior plastics turn cloudy. If your headlights are cloudy, hazed, and nasty, fear not; there is a simple fix. Several companies sell affordable headlight restoration kits that are quick and easy to use.
First though, know that you didn’t do anything wrong. Cloudy headlights are caused by a constant barrage of UV rays from the sun. Just as your vehicle’s clearcoat can be stripped away by UV damage, so can the outer layer of vehicle plastics. Fortunately, the solution is much cheaper than a new paintjob, and involves just grinding off the damaged layer, and resealing.
For this how-to, we’ll be using the 3M Auto Headlight Restoration Kit. This product is available at several auto parts chain retailers, is meant for light and medium UV damage, and costs all of $14.99. There were several more expensive kits at my local AutoZone, and I was wondering if cheaper meant crappier, or if it was possible to achieve decent results for not much cash.
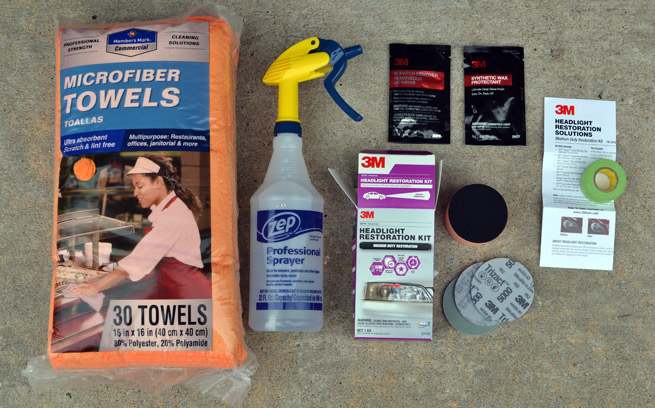
The kit comes with everything you need, minus a spray bottle filled with water and some microfiber cloths. No, you don’t need thirty, probably five or six would do it. Inside the box you will find instructions, a memory foam-like handle, three various grit sanding discs, polishing compound, a UV wax protectant, and green masking tape.
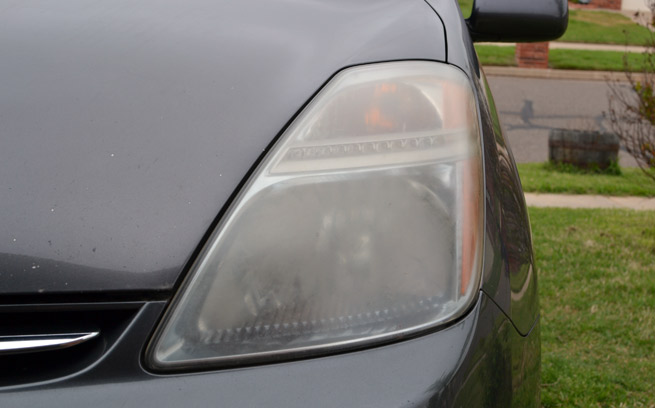
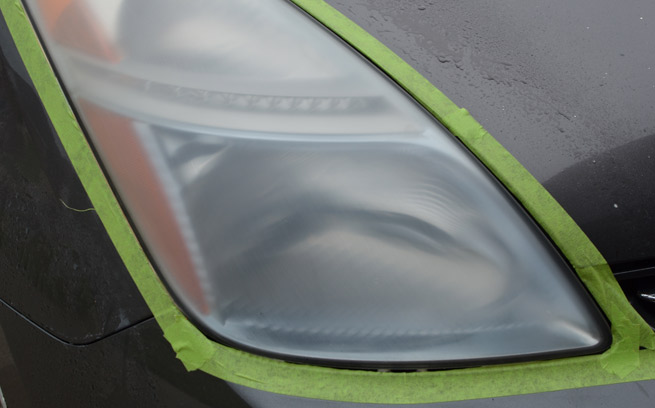
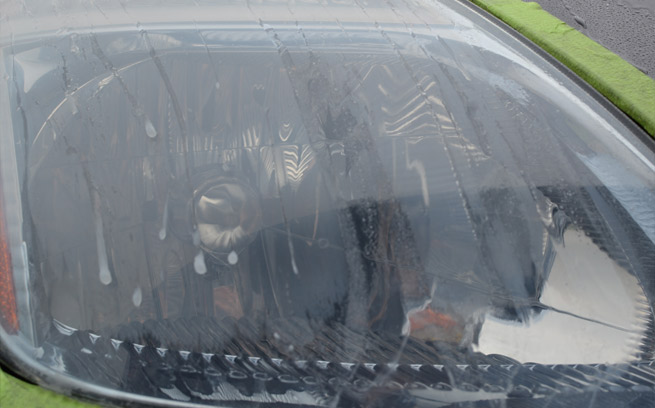
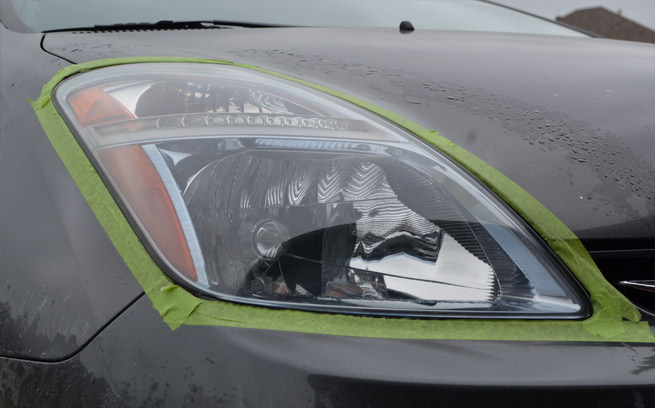
As you can see, the headlights on this car have seen better days. (Yes, that’s a Prius. Shut your face.)
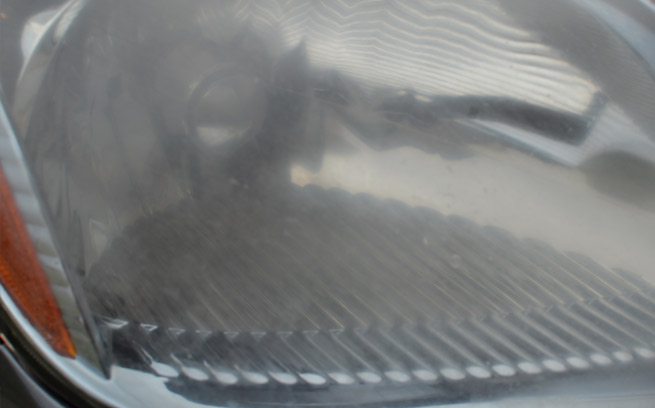
Ugh. You can barely see the bulb in there. This level of haze limits some light output, and is probably considered medium damage. Let’s get it off.
Start by washing your ride. You want to remove anything that is not supposed to be on the headlights. Sorry ladies, it’s time to pull those headlight eyelashes.
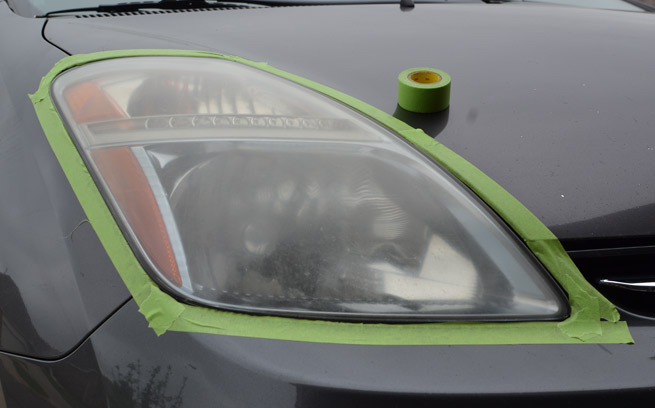
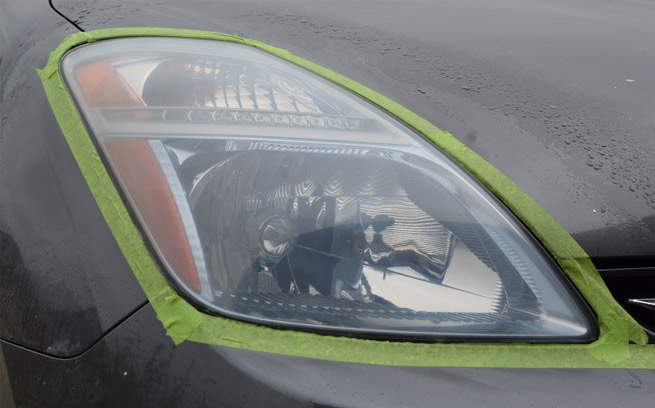
Begin by taping around the headlights. It doesn’t have to look nice, as this is just to keep the sanding discs off your paint. Once around should be plenty.
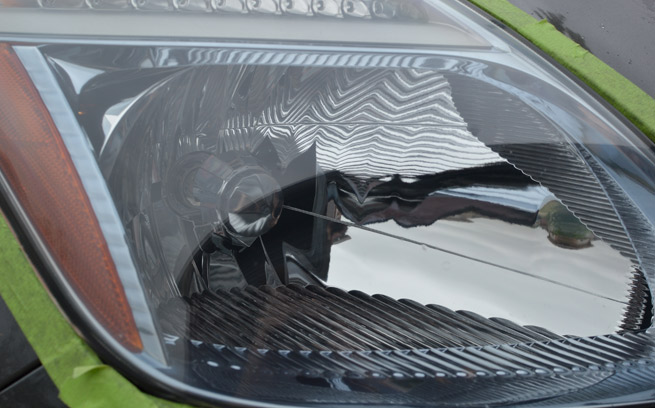
Then spray the headlight heavily with water. Attach the 1000 grit sanding disc to the foam handle.
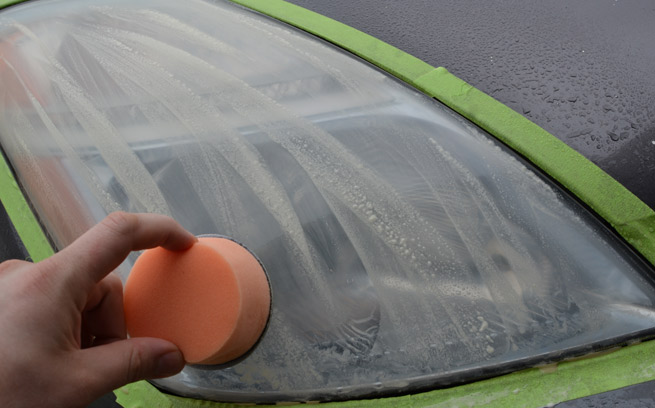
With the headlight wet, use medium pressure to sand in a front-to-back motion. You should notice the nastiness immediately coming off in cloudy streaks of water. Keep the headlight wet, and make sure you cover every inch at least twice. Take your time. If you think you hit it all, wipe clean with a microfiber towel.
Hmmm. This looks worse than when we started. Don’t worry, it’ll work out in the end.
Remove the 1,000 grit sanding disc and attach the 3,000 grit. Wet the headlight again.
This time, sand in a left-to-right motion. The idea here is to knock down all of the roughness left by the previous grit. Keep the headlight wet, and take about twice as long as the previous grit just to make sure you get everything. Wipe clean when you are done and see how it looks.
Alright, we’re getting there.
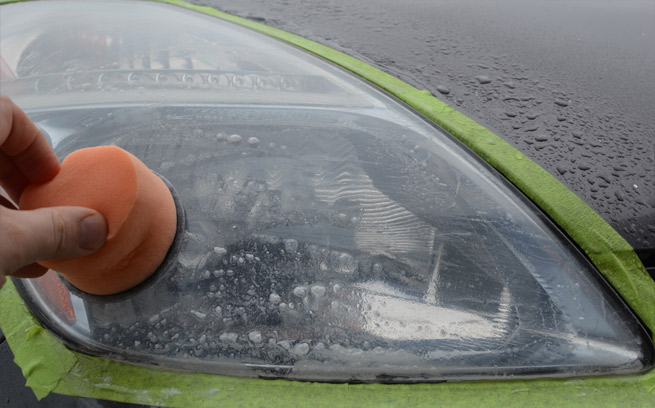
Remove the sanding disc and attach the 5000 grit disc. You know the drill: spray down the headlight.
Sand top-to-bottom again, making sure to knock off all the marks made by the previous grit. Keep it wet, and take twice as long as last time, just to be sure. By this point, the lens should be starting to look decent. Wipe dry.
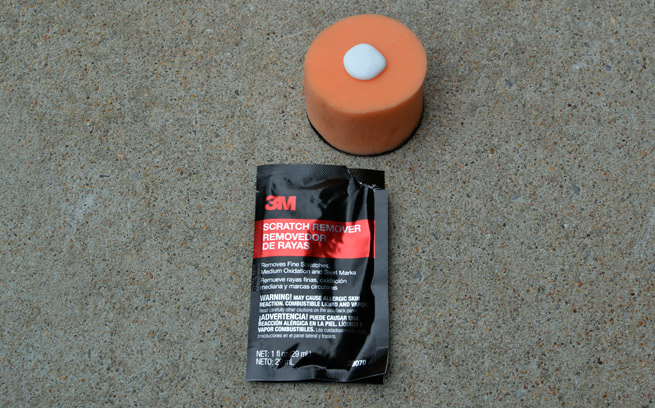
For the final sand, turn the handle around and pour some rubbing compound on the end of it, like this:
Oh, take that sanding disc off too. No need to sand your skin here.
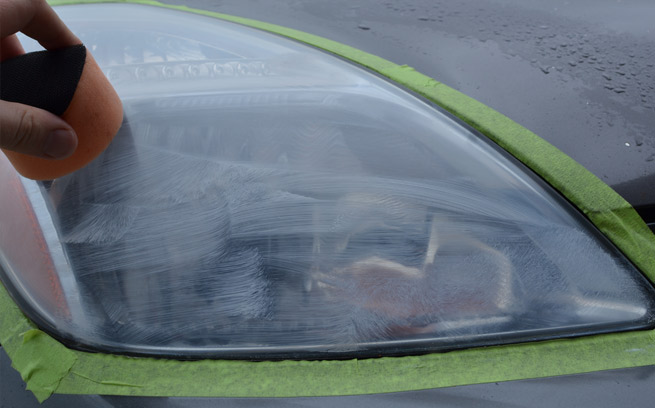
The instructions don’t care how you polish on this one, just get it done. Be sure to get everywhere, and don’t worry about the haze as it will quickly wipe off.
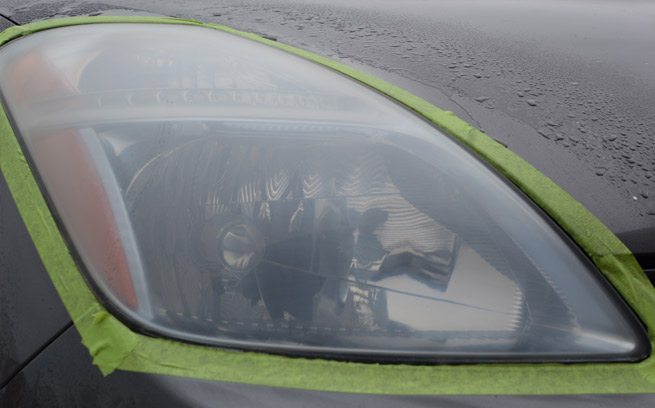
Not bad!
Hey, there it is. I knew that was in there somewhere.
For the final step, you need to make sure this doesn’t happen again. The answer to UV damaged plastics is to protect them with a UV blocking wax.
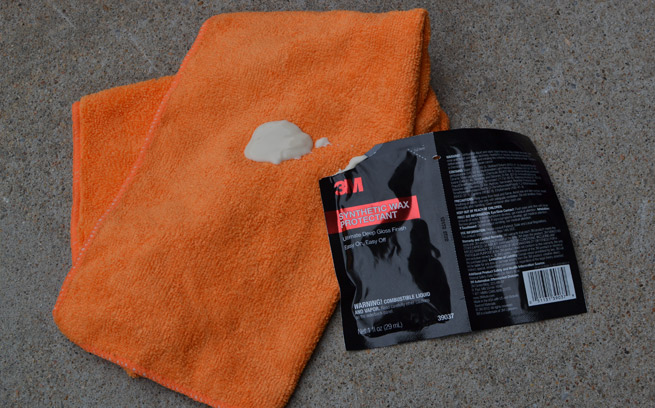
I ended up using the entire package on both headlights, but you can get by with the amount in the pic. Just be sure to cover the entire lens, and rub it in until you can’t see it.
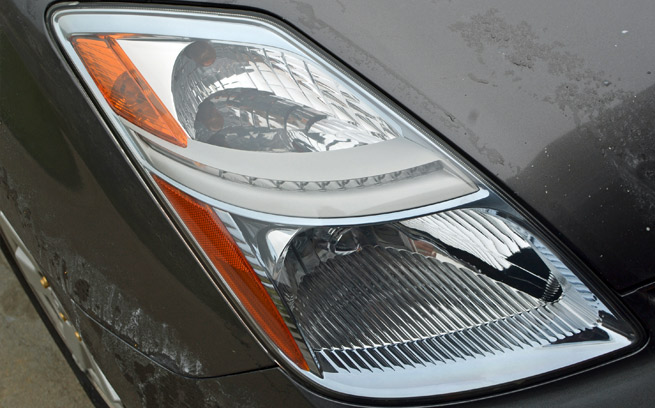
You can’t argue with the results. For just $15, the 3M kit gets the job done. Total time for both headlights, while taking pics, was about 45 minutes. Of course, now you need to wash your vehicle again, but at least the headlights look brand new. For headlight repair on a budget, it’s hard to beat the 3M Headlight Restoration Kit, but let us know if you have a better alternative.
Related Blog Posts

Cops and Donuts – ...

Interesting U.S. Auto ...

Most Iconic Cars of the ...

Google Maps Exotic Car Hunt

Route 66: The Mother Road

Victoria Beckham Spotted ...

Interesting and Funny ...

Funny Driverless Car Prank

Coffee and Cars OKC ...

Premium Vs Regular Gas – ...

11 Common Illegal Car ...

Performance Car Parts ...
Add A Comment